 |
Removing
the shell
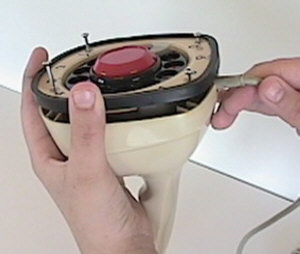
Start by
loosening (but not removing) the four screws in the dial face that hold the shell on. |
 |
Removing
the Standswitch
This is a tricky one that evades a lot of people. To remove the
Standswitch from the dial, you have to slide back the standswitch retainer clip on the
main spindle bearing plate. Reach in with a small screw driver and push back the clip and
the standswitch will pull right out.
|
 |
Removing
Finger Wheel
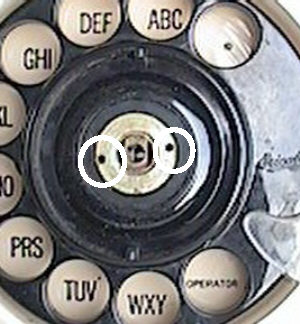
After removing
the Stand Switch, you can now remove the finger wheel. The finger wheel retaining
nut is removed by unscrewing it using a tool in the two holes shown.
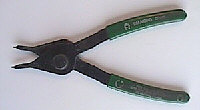
This is the tool I use to remove the fingerwheel nut. It's actually a "Retainer Ring
Pliers" and is a cheap tool you can buy at any hardware store. It works perfectly for
the job.
|
 |
Receiver
and Transmitter contacts
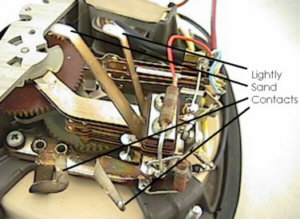
The Receiver and Transmitter are in the case and make electrical contact
with the chassis via spring contacts. Corrosion build-up on these contacts can interfere
with their performance. Lightly sand these or scrape them with a knife to make them
shiney. Be careful not to bend them out of shape in the process. These phones can be
tricky in re-assembly with contact positioning. If you put the shell back on the chassis
and either the transmitter or receiver don't work, try bending the contacts around a bit
to get a good contact. Usually, bending up on the receiver contacts and out on the
transmitter contacts does the trick. |
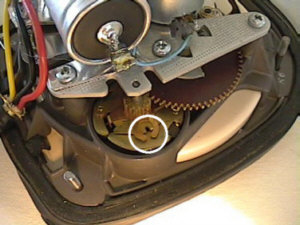 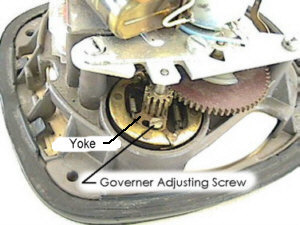
|
Adjusting Dial
Speed
The dial speed can be adjusted, but before doing so, it would be
best to try lubrication first. If that doesn't do the trick, then try adjusting the dial
speed governor. One point...never put lubricant into the governor.
To increase dial speed in the old style governor (top picture), insert a
screwdriver into the slot and twist counterclockwise. To decrease speed, twist
clockwise.
To increase dial speed in the new style governor (bottom picture), loosen
the screw and move the yoke counterclockwise, then retighten the screw. To decrease speed,
move the yoke clockwise. |
 |
Reassembly
To put the chassis back into the shell, turn it upside down and lower the chassis into
the shell watching to be sure the screws line up where they should be and the line cord
stress relief (metal tab) is held in place on the chassis.
If you took the screws out completely at the beginning, make sure you put the long ones
in front (near the transmitter) and the short ones in back (near the line cord). |
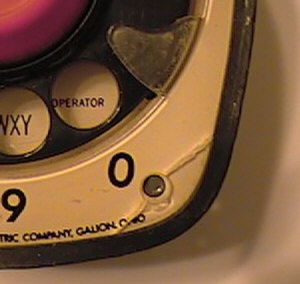 |
Important....
The cracks you see in the faceplates
of Ericofons are the result of over tightening the four mounting screws. When you put the
chassis of your phone back into the case, only snug the screws enough to hold it in place.
Use very little pressure when doing this or you will crack your faceplate. |