Color Restoration
Okay class, today we are going to resurrect
the dead, so please pay attention and take notes.
Seriously though, color restoration is not an
easy task, but on the other hand, you don't need to have a big workshop to do it. The
method I show here can be done at home with a modest investment and still get good results
in about 45 minutes. The finished product can be nearly as good as factory if you take
time and do it right.
Ericofons are prone to "color fade".
This is when they discolor and take on a nicotine yellow hue to them. It's a combination
of age and exposure to sunlight. I have found that some colors discolor more than others.
Red for instance rarely discolors. Blue and gray are notorious faders. Also, some colors
fade "deeper" than others. When restoring a white, not much sanding is needed to
get back to the original color. On the other hand, gray fades very deep and needs to have
the beegeebers sanded out of it.
I recently completed a major color restoration
on a Princess Pink. CLICK HERE to take a
look.
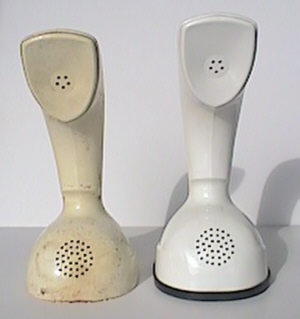 |
Starting off, you can see the poor soul on the left is actually a
"Taj Mahal" (white) and needs a bit of help. I placed a comparable phone on the
right. As you can see, the color is faded pretty badly. I start out first by cleaning
the dirt and grime with a cleaner called "Formula 409". It's basically a spray
cleaner with de-greasers.
When cleaning, be sure not to spray a lot of cleaner into the ear holes. Also, it's
best to remove the transmitter element (at the bottom) before starting. |
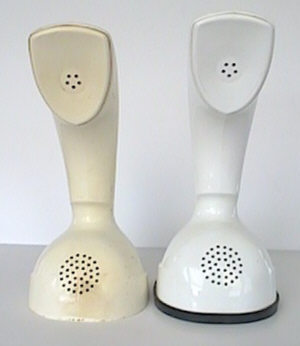 |
Okay, as you can see, the cleaner went a long way to getting rid of the
grime. Next is sanding. I start out with 180 grit on a palm sander. A palm sander is
the best bet as it moves extremely fast, and in a circular motion. This helps prevent
sanding lines, especially if you have to dig deep.
If the color fade isn't too deep, I will start with 320, but in most cases I end up
starting with 180 so I don't spend forever trying to get the color back.
|
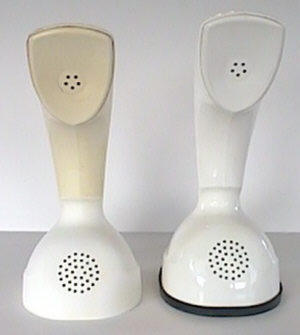 |
In this case, I went with 180 grit paper. The 320 was just progressing too
slowly. I stopped half way up the phone to take a picture to show the progress. You want
to look at the shell under good light to look for fading. If you see any color
differences, continue the coarse sanding. Once you proceed to finer grits of paper you
won't be changing color any more, only smoothing. The best way to know what color your
phone should be is to look inside the shell, they never color fade inside.
After getting the color the way you want it, progress to 400 grit paper, then 600, then
1000 grit. You should try to spend around 5 minutes or more per grit. The more you sand,
the smoother you get. Don't try to change color with any of the finer grits, it just won't
happen. All color restoration must be accomplished with the coarser grits. |
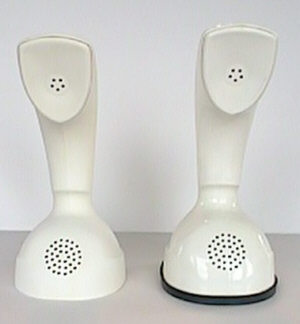 |
Here's the shell after 1000 grit paper. There are 2 ways to go from here.
You can go to buffing on a "spiral sewed" wheel with tripoli compound, or you
can use 2000 grit sandpaper. I use 2 wheels on a standard 6" home bench grinder.
The first wheel is a "spiral sewed" (#40) using tripoli compound. The second is
a "cushion sewed" (#36) wheel with PBC compound.
WARNING: The bench grinder turns WAY too fast for buffing, so you have
to be very very careful not to melt the shell. Always keep it moving, keep the pressure
light, and don't dwell in concentrated areas allowing heat build up. ALSO,
be very careful how you hold the shell against the wheel. If it gets hold of the shell,
you'll have a lot of little bits of plastic everywhere and no phone (and possibly an
injury from the plastic shrapnel). Don't go too slowly, but down go too fast either. I
have found that going just the right speed to allow the plastic to warm up a bit causes
the plastic to "reflow" to some extent. This will get you very close to a
factory shine if not a perfect match. |
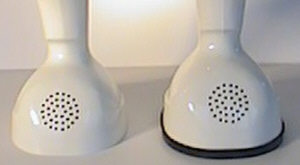 |
I tried to get a picture here to show the difference in shine between a
restored phone and an original finish. You can see that the reflections are just a bit on
the dull side with the restored phone. Even so, it still looks good by itself. |
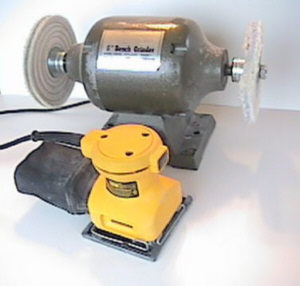 |
Here's my "arsenal". The wheel on the left is the spiral sewed,
the one on the right is the cushion sewed. This is a bench grinder I already had, I just
took the guards off and used washers to space the wheels away from the motor for more room
to move. The cushion sewed wheel is great for shining up phones too, not just for
restoring. If you have a phone that isn't color faded, but just dull, this wheel is great
for making it look new again. And if it has some scratching, the spiral sewed is good for
buffing those out before shining up. These wheels and compounds are readily available at
just about any hardware store. The palm sander is one I bought specifically for working
on phones. It has a square pad on it that is great at getting into tight places using the
corners of the pad. |
|